


One of the most important Eyecad VR feature is the possibility to share your own project with your work friend or customers.
You have different ways to share, from Desktop (EVR files) to another Desktop, or Panorama tour through the new tool EYECAD 360.
In this guide it is explained how these two different sharing modes work.

Share Interactive explorable scenes in real time (Desktop only).
The first thing to do, is to click on the “Sharing” TAB that will drive you on the sharing mode you need. Click on the “Desktop” icon and go forward.
At this point, you can just click on “upload new project” and you will obtain a link that you can use on the Viewer. Your customer or work friend will download the explorable scene only (not editor mode). You can manage your projects in cloud inside the VR Viewer Manager.
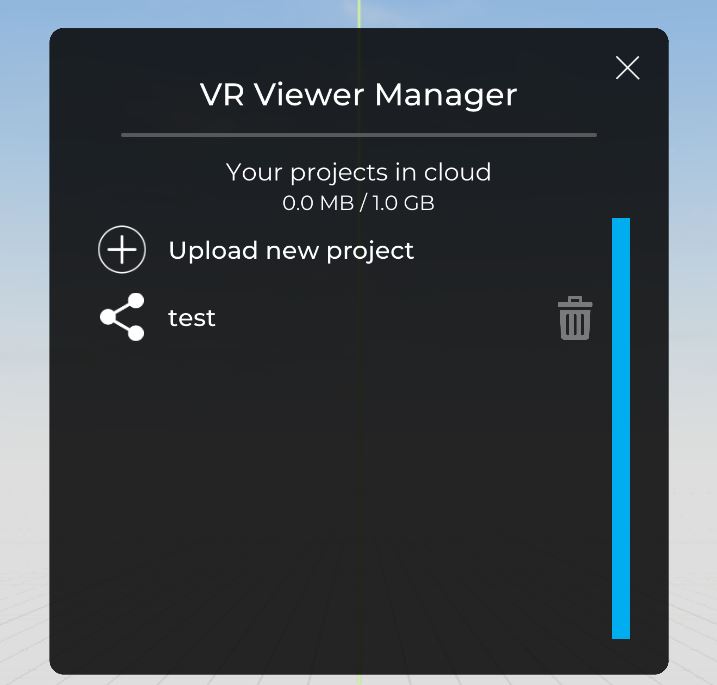
Remember you need to save your EVR project before to upload it in cloud.
Inside the viewer, the project will be explorable via monitor (with keyboard and mouse) or via PC VR headsets :
- Oculus Rift S
- Oculus Rift CV1
- HTC Vive
- HTC Vive Pro
- WMR headsets
Create and share 360 degree panoramic tour rendering via web-link (Desktop and mobile)
The new EYECAD 360 tool is very useful to create and share 360 rendering tour to your customers or work friends.
The first step is to choose the “360 degree” icon to enter in EYECAD 360 in the “Sharing” TAB.
Once inside, you need to create the first photosphere by clicking on “Add”.

Now, you are in the preview mode, and here you can update the position of your point of view, change the brightness, the hour or the POV height from the floor by the lateral editor on your right. When you click on “Update position” the camera will be locked to help you to understand that the Point Of View has been saved.

At this point, you have to click on the “Render Panorama” icon (remember that you can render in both realistic and ray tracing mode).
Repeat the same workflow to add a new Point of View.

The last thing to do, to create a tour of the all 360 panorama scenes created, you can add, in each scene, the Teleport points, by clicking on the arrow icon. A new menu will appear in the preview window and with a simple drag’n’drop action, you can add the teleport point of the other 360 rendering created.
When you have finished to set the tour, just click on “Upload in cloud” to create a weblink to share to your work friends or customers.

The 360 Panorama tour could be manage inside your own personal area in eyecadvr.com.
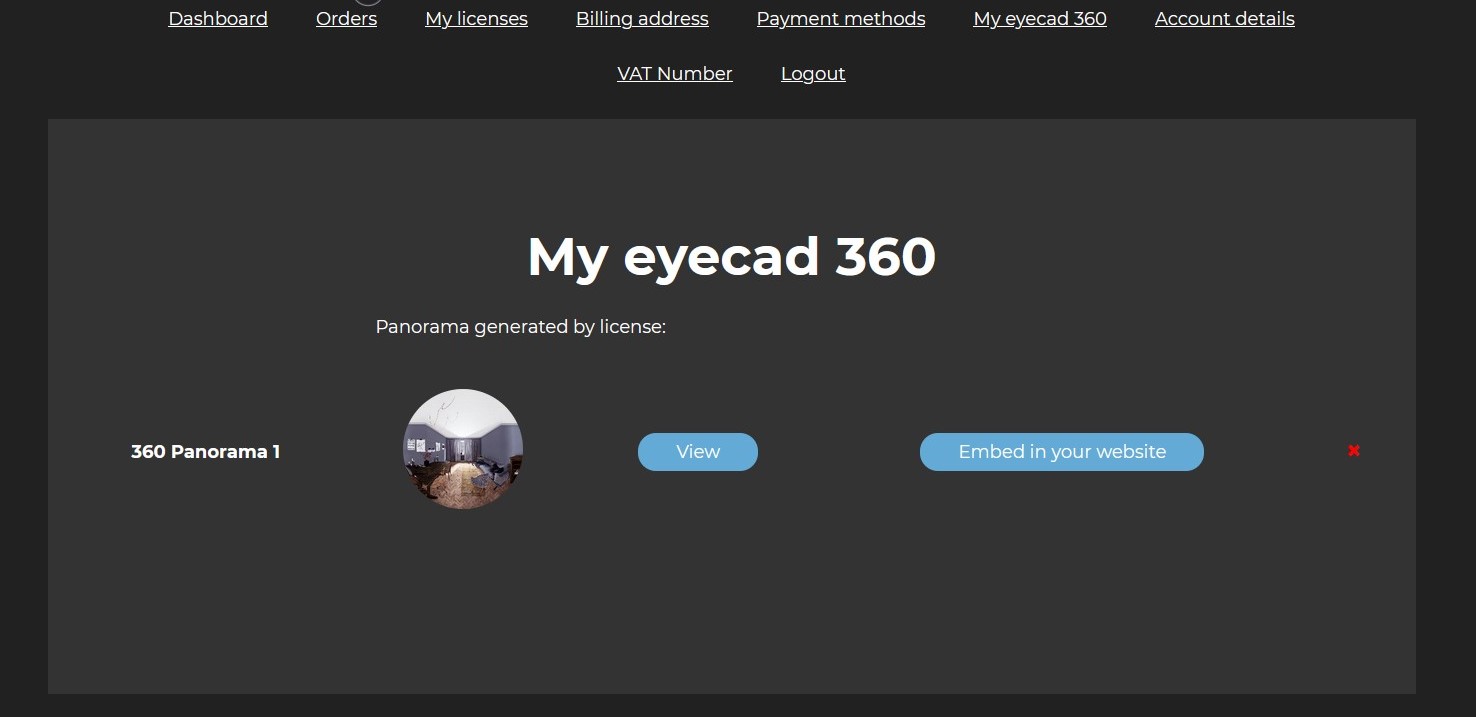
Inside the “My eyecad 360” area, you can open the link or, by clicking on “Embed in your website” you can add your panorama tour on the web.
This sharing mode is compatible with every device that could open a browser, from smartphone to Desktop, and is possible to watch the panorama tour with PC VR headsets or mobile VR headsets. In the case of mobile VR headsets, you need to open the browser and enter in your personal area of the Eyecad VR website.
Mobile and standalone VR headsets:
- Oculus Quest
- Oculus Go
- Htc Vive Focus