


The “Landscape” tab allows you to create and modify the elements of the natural or artificial landscape of the project, through the configuration of different parameters. The “Landscape” TAB interface includes the ability to view or not the terrain in 3D (show/hide 3D terrain) and the creation commands “Terrain”, “Trees”, “Rocks”, “Painter”, “Water ”,“ World Map ”as well as the brush configuration options that allows you to create and modify all the parts related to the territory conformation.

Eyecad VR allows you to import real parts of territory (with the help of Open Street Map and Digital Elevation Map technology) or to directly model one, let’s see how:

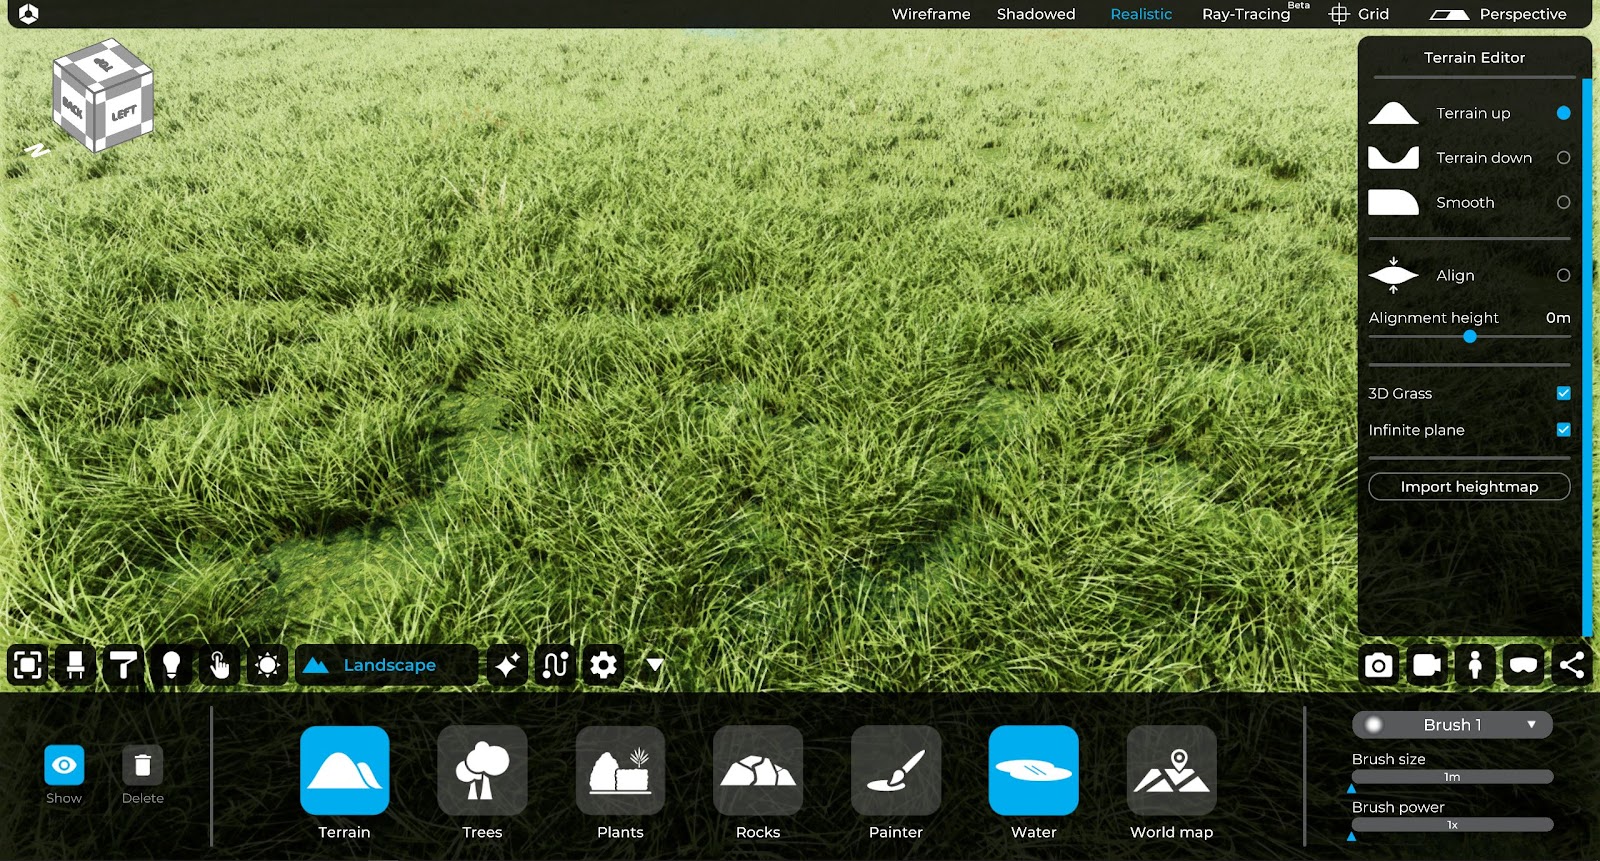
Once inside the “Landscape” tab, at the bottom left we can generate and / or hide the 3D terrain, if one has already been created it can be deleted using the “Delete landscape” button. The 3D terrain consists of an “infinite” plane on which it is possible to act, by modeling, by raising, lowering, leveling the ground to make it conform to the setting you want to recreate. Other actions are available and are discussed in detail below.
Terrain
This is the tool that deals with soil modeling, by clicking on its icon representing two hills, the “Terrain Editor” menu will appear on the right, showing the following actions:
- Terrain Up
- Terrain Down
- Smooth
- Align
- Alignment height
- 3D Grass
- Infinite plane
- Import heightmap

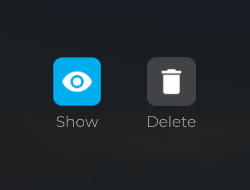
First of all, in order to perform modeling on the ground, the Terrain must be activated, using the function: “Show”.
Terrain Up
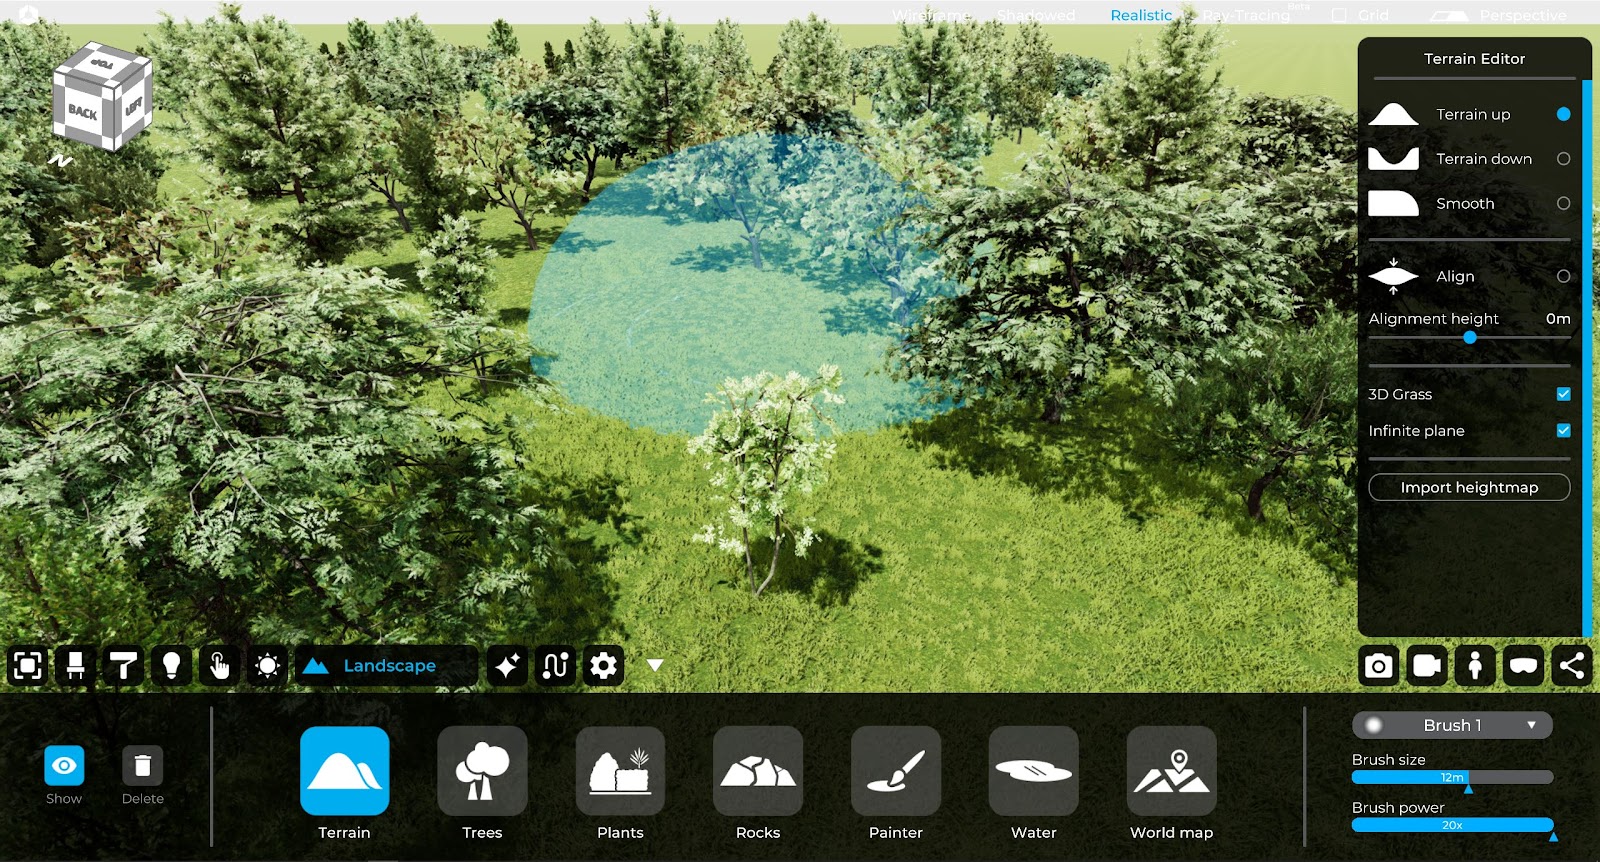
Selecting the action “Up” it is possible to make changes on the ground, in the area indicated by the size of the “brush”, bringing it to the desired height. For a more precise or more general action it is possible to choose the size, strength and shape of the “Brush”.
The Brush is located inside the “Landscape” tab on the right.
Terrain Down
Selecting “Down” it is possible to work on the ground by lowering the area of the selected land to the desired height. For a more precise or more general action it is possible to choose the size, strength and shape of the “Brush”.
Smooth
Selecting the action “Smooth” it is possible to intervene on the ground by softening the curves between the different dimensions of the ground. For a more precise or more general action it is possible to change the size, strength and shape of the “Brush” (brush).
Align
Selecting the action “Align” it is possible to intervene on the ground bringing it to a very precise altitude. For a more precise or more general action it is possible to change the size, strength and shape of the “Brush” (brush).

3D Grass
This function allows to generate 3D animated grass for the natural landscape. It suggested to model the 3D terrain without the 3D grass on, especially for not high-end PCs. It is possible to generate the 3D grass by clicking on the 3D grass toggle button.
Infinite Plane
It generates an infinite plane to simulate the horizon for the 3D scene, however, it is possible to modify the 3D terrain up to a certain point.

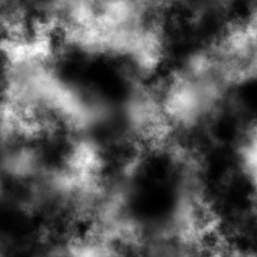
Import Heightmap
This helpful function, allows you to import the territorial trend by one image that describes it. Eyecad VR, once imported it, will automatically create the territorial trend. This kind of images are created with a lot of software. In Eyecad VR is possible to import the heightmap images in these formats (jpg, png, tiff, tif) :
Plants
If you need to add 3D plants for private or public gardens, this is the right area, here in fact, you can choose from a lot of different types of 3D gardens decorative plants, like bushes small trees and more. Just drag’n’drop the objects from the lateral menu to the scene.

Trees editor
If the 3D project is inserted in a natural landscape or in a park, reserve or urban area, surely there will be a need for the insertion of some trees in it to be able to represent it at its best. Eyecad VR provides a library of different trees that can be freely inserted into your project.

To be able to insert trees in the project, just go to the “Landscape” tab and select the “Trees” button.
Once selected, a menu called “Trees Editor” will appear on your right, where you will find different types of trees. If you want to perform a fast filling action of the landscape with different trees you can use the brush that will help you in the execution of the action.

To speed up the operation of general filling of the landscape select the function: “Select all”, which will select all the trees in the library by positioning them on the ground when the brush passes over it.
It is possible to select the type of trees of our interest and insert them with the brush on the ground.
Also in this case, for a more precise or more general action it is possible to choose the size, strength and shape of the “Brush” (brush).
If instead you need a timely, more precise regulation, you can select and drag a tree directly from the library to the terrain where you want the plant be inserted. In this case, the trees dragged manually will not be anchored to the 3D landscape.
If you want to delete an area of trees without removing them individually, you can use the “Delete trees” tool at the top of the “Trees Editor”.
In the case of manually dragged trees, you can also delete a tree individually by simply clicking on it and pressing the “Delete” key on the keyboard.
Adding trees by brush:
Adding trees by drag’n’drop from the trees library:

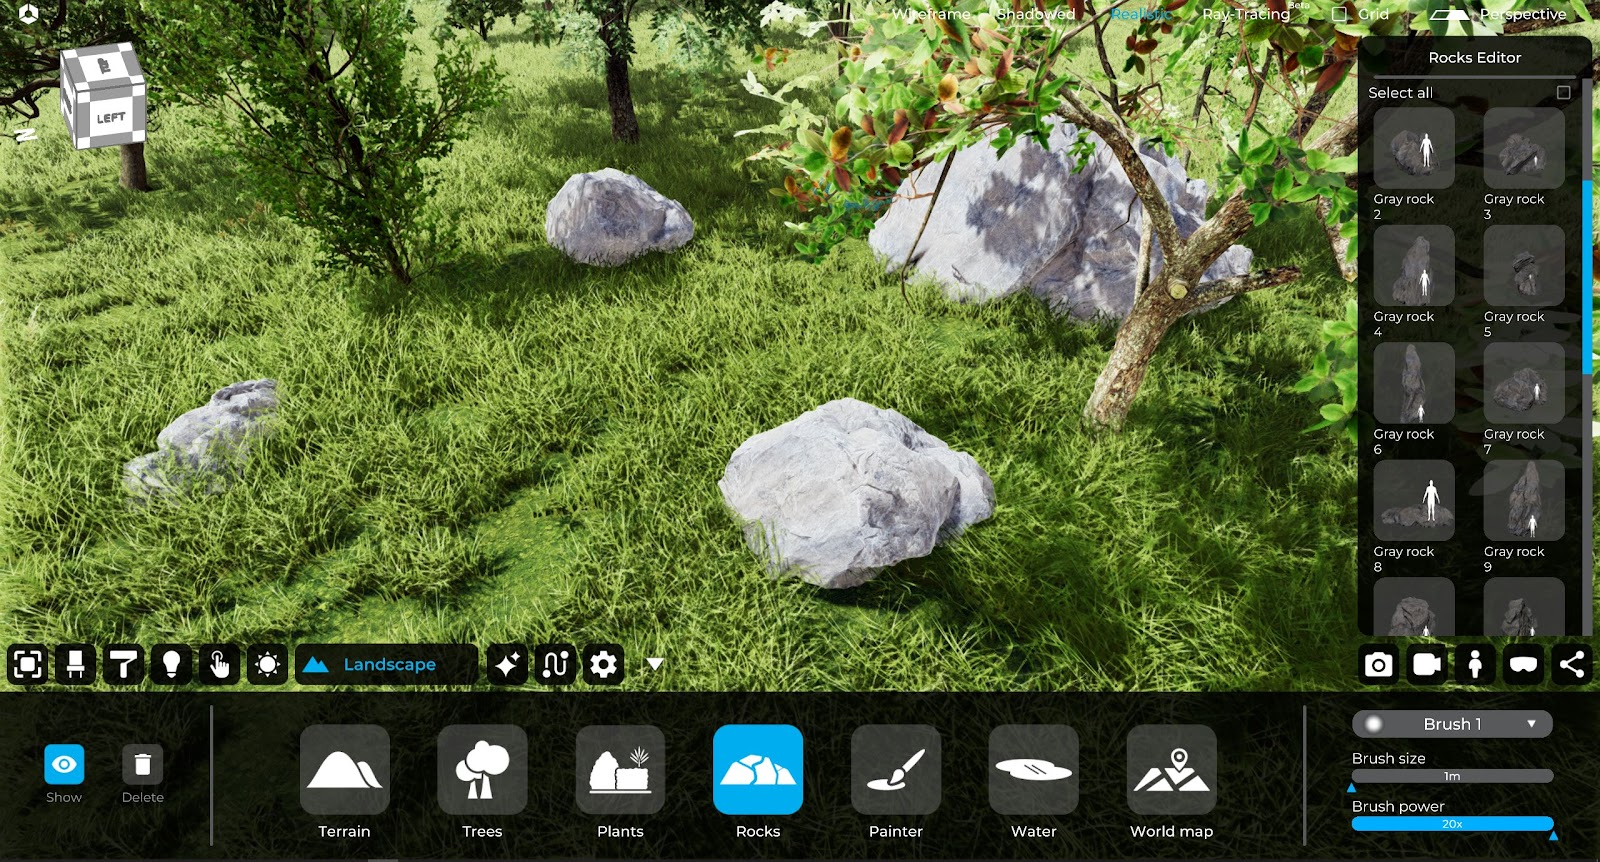
Rocks editor
If the 3D project is inserted in a natural landscape or in a park, reserve or urban area, surely there will be a need for the insertion of some rocks in it to be able to represent it at its best. Eyecad VR provides a library of different rocks that can be freely inserted into your project.

To be able to insert the rocks inside the project, just go to the “Landscape” tab and select the “Rocks” function.
Once selected, a menu called “Rocks Editor” will appear on your right, where you will find different types of rocks. If you want to perform a quick action to fill the landscape with different rocks, you can use a tool that will help you carry out the action.
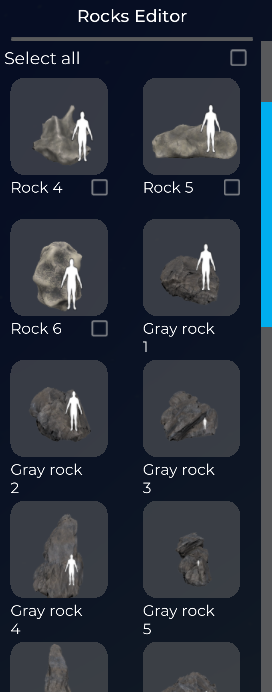
To speed up the general filling operation of the landscape, select the function: “Select all”, which will select all the rocks in the library by placing them on the ground when the brush passes over it. This function works with little rocks only.
It is also possible to select the type of rocks of your interest and insert them with the brush on the land.
Also in this case, for a more precise or more general action it is possible to vary the size, strength and shape of the “Brush” (brush).
If you need timely, more precise intervention, you can select and drag a rock directly from the library to the point where you want it to be inserted. This function works with all rocks in the rocks editor.
If you want to delete an area of rocks and without removing them individually, you can use the “Erase rocks” tool, at the top of the “Rocks Editor”.
You can also delete a rock individually, simply by clicking on it and pressing the “Delete” key on the keyboard. This function works with the manually dragged rocks only.
Painter
In this section Eyecad VR allows you to also customize the texture of the soil by being able to choose from a range of textures ranging from sand to grass, from rock to soil.

To be able to apply these textures, just go to the “Landscape” TAB and click on the “painter” icon. Once this is done, the “Painter” menu will appear where you can choose the texture that best suits our use, including:
- Sand
- Grass
- Rocks
- Ground stones
- Ground
- Ground 2
- Ground 3
Please note: Other painter textures will be added on the future updates.

To apply them to the ground, just choose one from the menu and apply it by pressing the left mouse button on the ground using the Brush (brush).
Also in this case, for a more precise or more general action it is possible to vary the size, strength and shape of the “Brush” (brush).
If you want to delete an area of soil texture we can use the “Erase texture” tool, at the top of the “Painter editor”.
If you want to delete the 3D grass in a specific area just use the grass texture from the painter and the 3D grass will be deleted from the 3D scene.
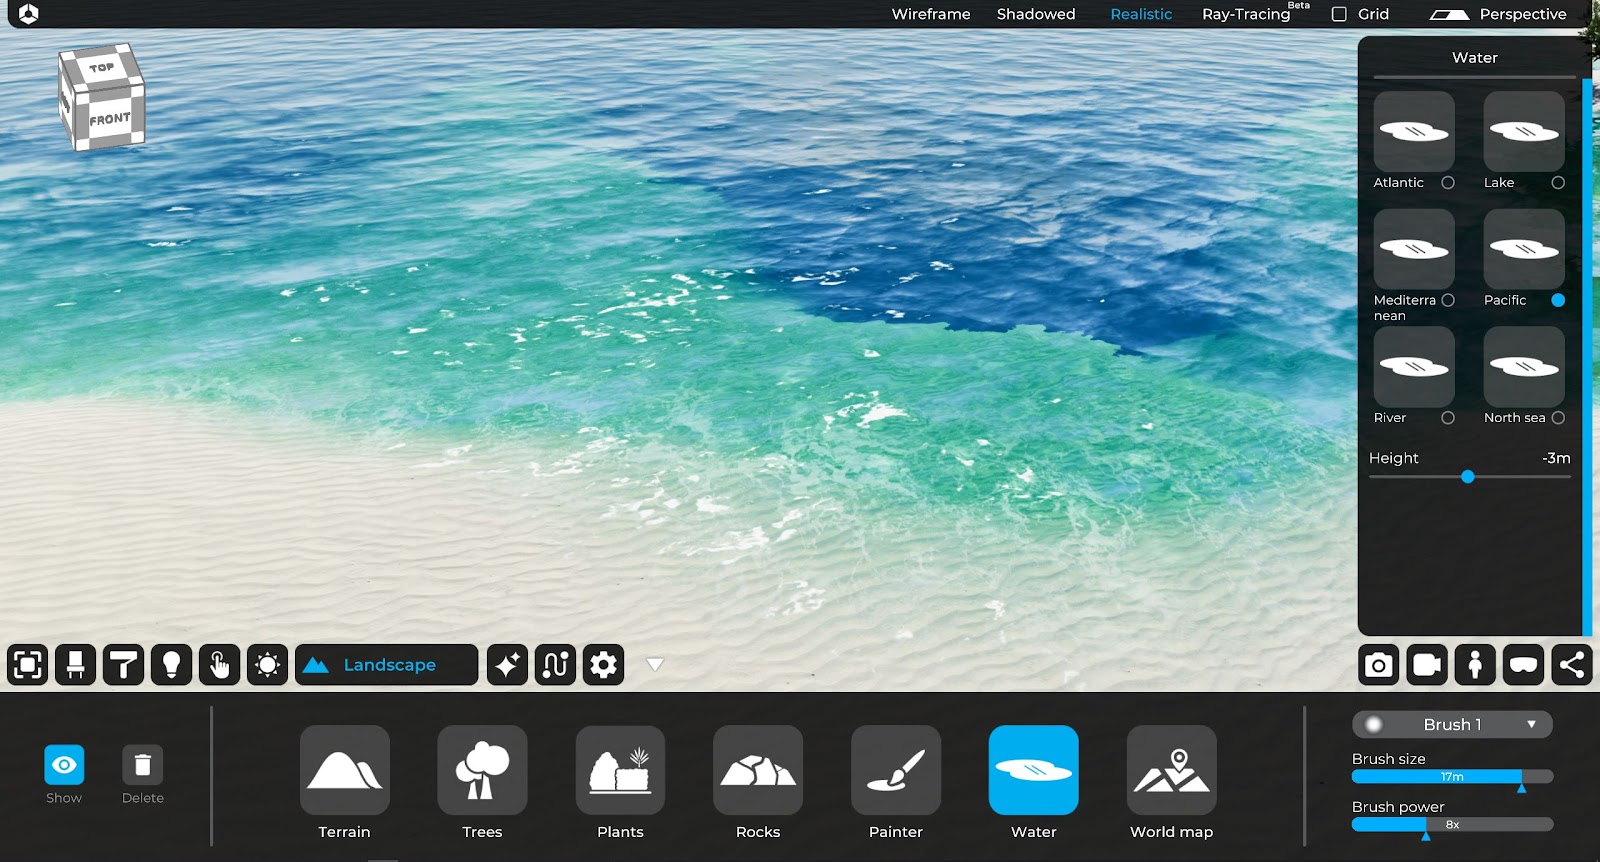
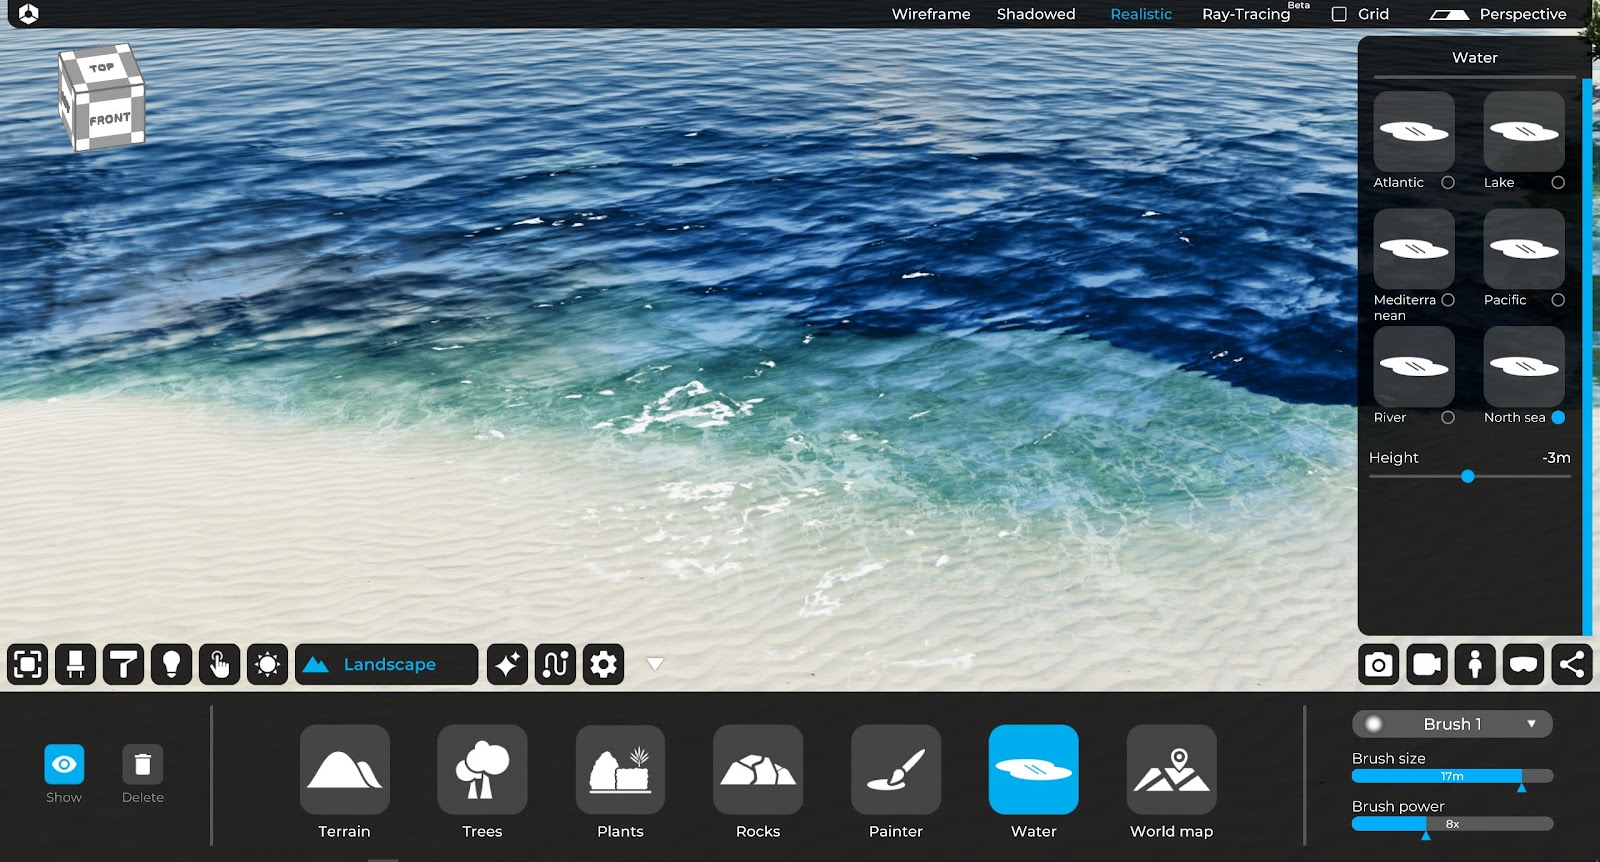
Water
Inside the “landscape” TAB we find the “Water” section, very useful if the project is placed in a context near a lake, river or sea. To be able to interact with it and see the changes it is necessary to activate the switch: “Show 3D terrain”, which is located at the beginning of the “Landscape” tab.
Going to the “Water” section and here you can choose from the “Water Editor” (which will appear once you click on the Water icon), which type of “water” we want to simulate. The choice is divided into five types:
- Lake
- Mediterranean
- Pacific
- River
- North Sea
Once you have chosen the type of water to be simulated, you will need to set the height of the water to at least 1m (one meter) to be able to see its simulation, or push the 3D terrain down. The height of the water surface is adjustable using the “Height” value bar inside the “Water” editor. Together with the height, it is also possible to adjust the water stirring state through the value: “waves”, which is always inside the “Water” editor.
Below are the reference images of the type of water, in order:
Lake

Mediterranean

Pacific Ocean
River

Atlantic Ocean

North Sea
World map
in the “Landscape” TAB it is possible to import a portion of the geographical area of the terrestrial globe. Just go to the “World map” section in the “Landscape” tab. Once inside the “World map” section, the “Real World Editor” will appear as usual.

In the search bar just below the map, we can quickly search for the city we want to import. If, on the other hand, you want to make a more accurate search, you must go to the inside of the box containing the map and perform Pan and scroll. Once the area to be imported has been identified, click on the blue “Generate Real World” button. You can choose whether to insert:
- Satellite images: it will apply satellite photos to the ground;
- 3D Buildings OSM (Open Street Map): it will import in the correct position the simplified volume of the buildings present in the selected area, green park area, trees, streets and more urban details;
- Elevation DEM (Digital Elevation Map): the soil will be imported with its topography.
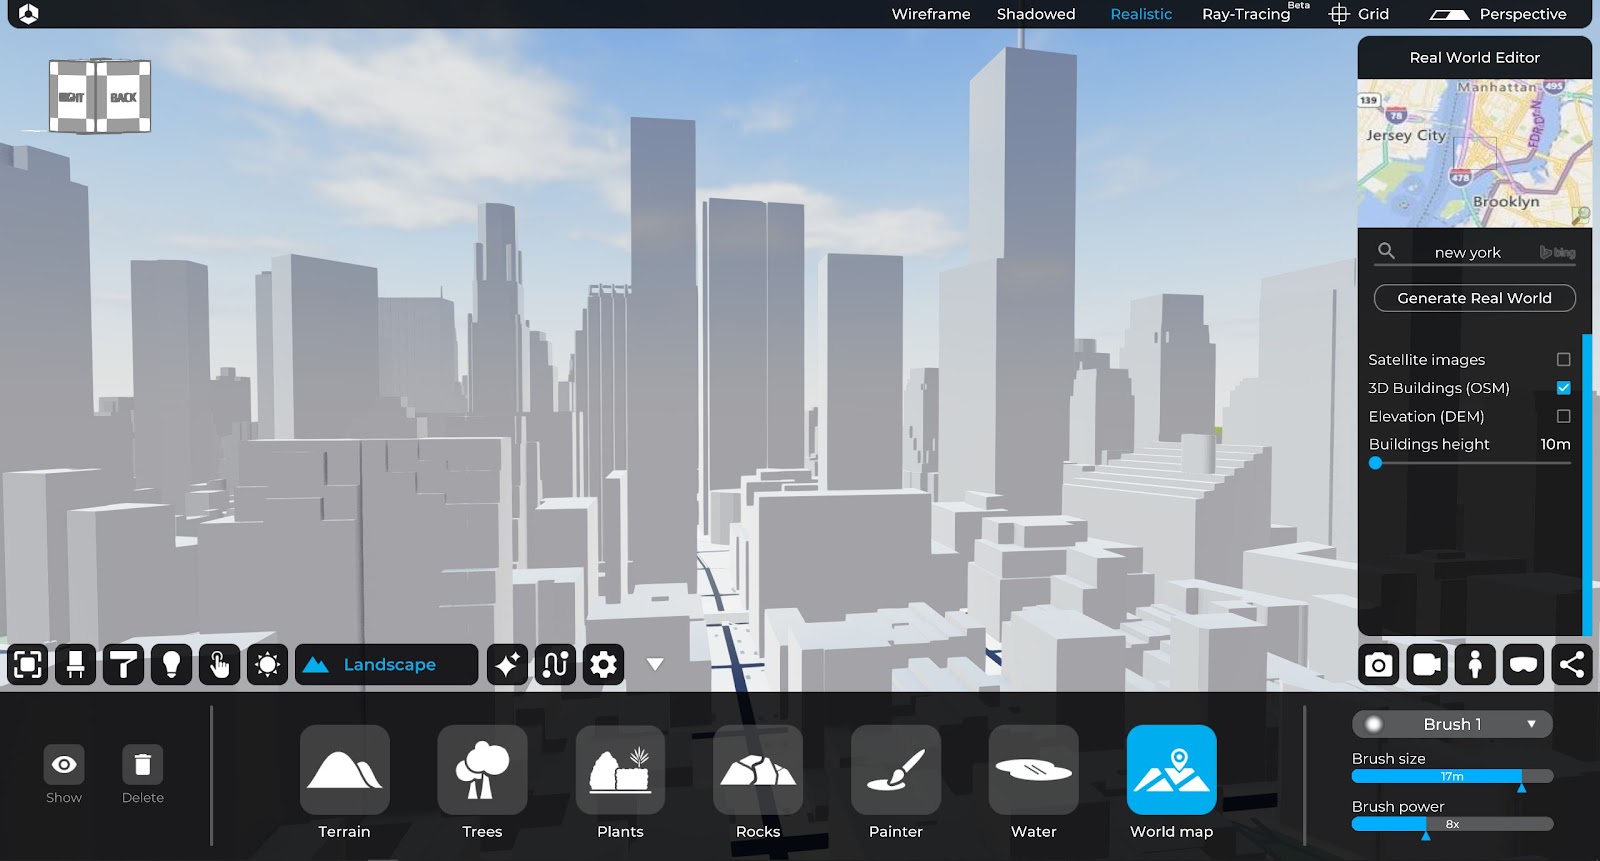
It is also possible to intervene on the height of buildings, using the “Building height” value bar in m (meters)
Whenever you want to make a change to the imported soil and update it, just click again on the blue button “Generate Real World”.
