


The “Materials” TAB allows you to create and modify all the materials that can be used in Eyecad VR, as well as the access to the software’s libraries.


The “create a new material” command allows to access to a menu of options relating to the parameters of the editable material, as well as the possibility of assigning a name and saving the changes made.
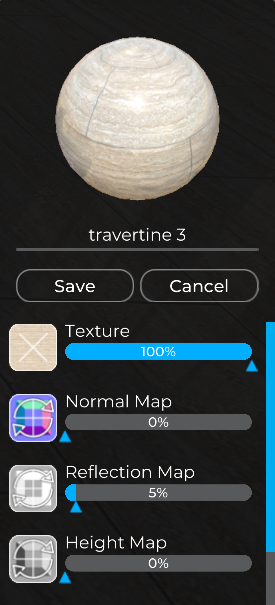


The default Eyecad VR material is PBR (physically based rendering) although the terminologies used in the editor have an hybrid characterization. By opening the materials editor it’s possible to access to the “texture map”, “normal map”, “reflection map” and “height map” mappings, that normally are automatically created by Eyecad VR, but is possible to add every single customize map. Is possible to set the RGB color parameters, in addition to define the parameters Transparency, Lucidity, Metallic and Emission.
Physically Based Rendering (PBR) is a method of shading and rendering that provides a more accurate representation of how the light interacts with surfaces. It is referred to as Physically Based Rendering (PBR) or Physically Based Shading (PBS). Depending on what aspect of the pipeline is being discussed, PBS is usually specific to shading concepts and PBR is specific to rendering and lighting. However, both terms describe the process of representing assets from a physically accurate standpoint.
Texture map
The texture map is the first of the four material maps options in the materials editor. Clicking on the preview box (“+” command) activates an upload menu that allows you to search, select and upload an image in .png, .jpg or .bmp formats.
The Texture Map item also includes a percentage slider, which allows you to set the texture visibility choosed. The values lower than 100 actually introduce a transparency component which reveals, for the remaining percentage, the basic color of the material.
Normal Map and Reflection Map
Eyecad VR automatically generates the Normal Map and the Reflection Map from the imported Texture Map. It is therefore not necessary to be in possession of the entire PBR texture kit, but only the RGB texture is sufficient. According to the PBR conventions, the Normal Map is useful to define the effects of relief without corresponding to an actual geometric detail of the object where the material is applied. The same operating logic, in the case of reflections, it has to be applied to the Reflection Map.
Once the texture import operation has been completed, eyecad VR will automatically process the image of the Normal Map (a technique used to simulate the complexity of the survey of surfaces without modelling them in detail) and the image of the Reflection Map (it is an efficient technique of image-based illumination to approximate the appearance of a reflective surface using a precalculated texture image).
Height Map
Eyecad VR automatically generates the Height Map from the imported Texture Map. It is therefore not necessary to be in possession of the entire PBR texture kit, but only the diffuse texture is sufficient. According to the PBR conventions, the height map is useful to define the effects of 3D relief.
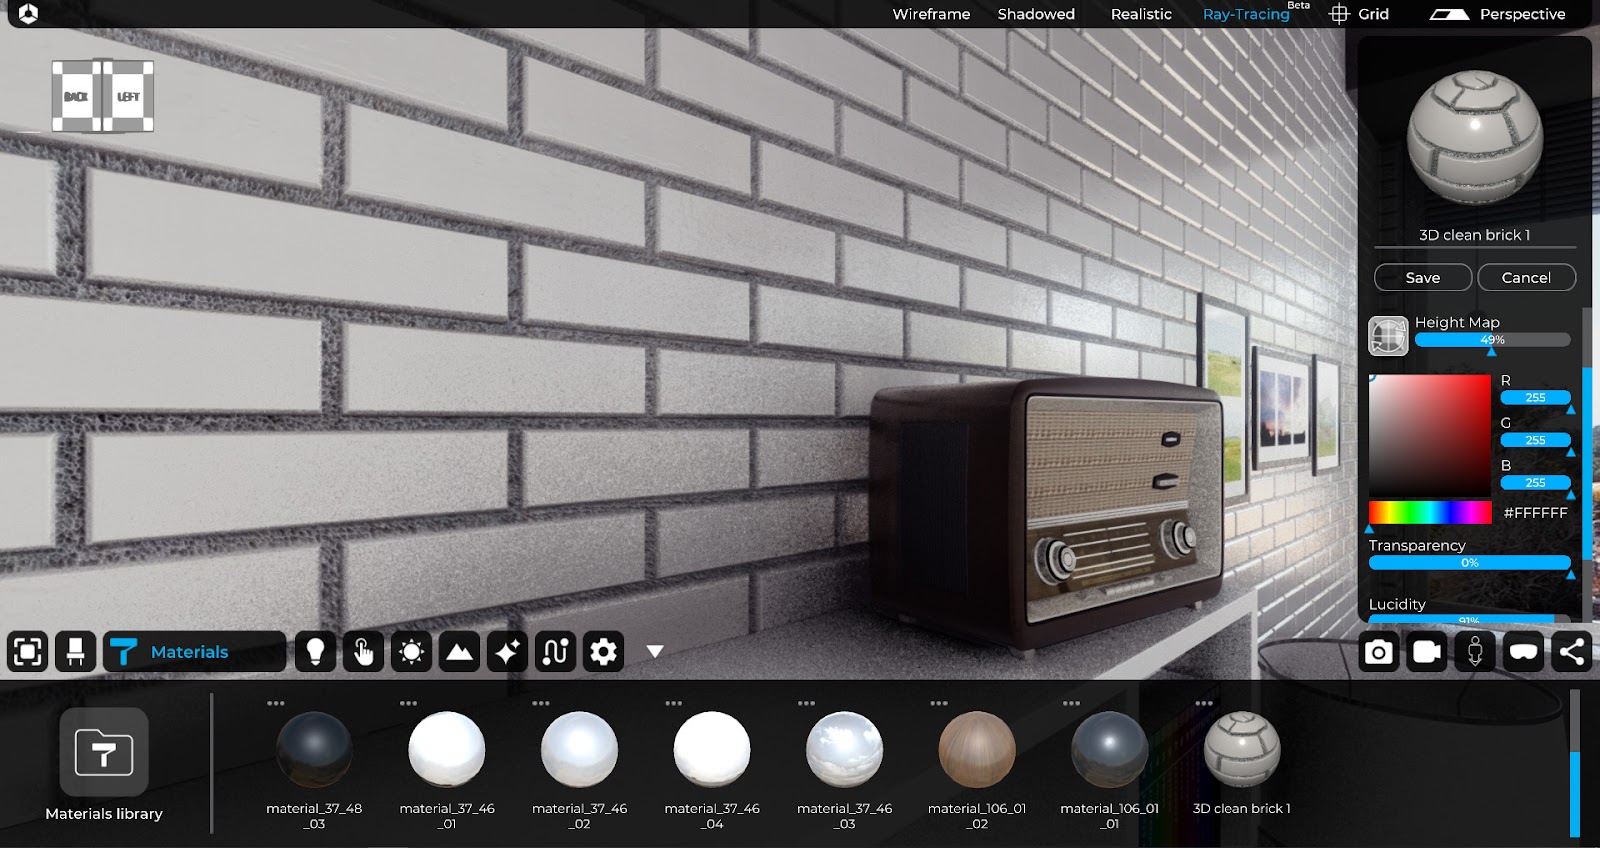
After this operation, it is possible to change (in order of percentage) the effects that the latter have on the material. You can see a preview of the top material, in the menu.
Please note: This function is highly suggested for cubic objects (like as floors,walls etc…) and not for spherical objects.
Basic properties of the material
The materials editor allows defining the final appearance by modifying the following parameters:
- RGB
- Transparency
- Lucidity
- Metallic
- Emission
RGB
It allows to define, through the mix of the three RGB parameters (red, yellow, blue) the basic color of the material. You can also enter a hexadecimal color code or select the color using the two visual preview modes provided.
Transparency
It allows to define the transparency of the material. In other words, the ability of the material to be crossed by light. It is expressed in percentage terms from 0 to 100 (%).
Lucidity
It allows to define the lucidity of the material. In other words, the material’s ability to reflect light on its surface. It is expressed in percentage terms from 0 to 100 (%).
Metallic
It allows to define the metallic value of the material. In other words, the ability of the material to simulate the typical surface characteristics of metals. It is expressed in percentage terms from 0 to 100 (%).
Emission
It allows to define the light emission of the material. In other words, the ability of the material to emit light, of the same color defined in the RGB parameter, according to the intensity expressed in percentage terms, from 0 to 100 (%).
Two-sided-mode
The materials editor allows you to activate the “two-sided-mode” option. Its effects are easy to understand when assigning the material to an object present in the project scene. The fact of making the material visible both inside and outside the surfaces that characterize the object during rendering makes it possible to overcome the problems of “mesh normal inverted” that can be inherited during the import phase of 3D models all inside of eyecad VR. By default the “two-sided-mode” option is deactivated, because it is highly suggested to fix the direction of the mesh in the 3D modelling software. Anyway, its activation affects transparencies and reflections:
Two side mode – off
Two side mode – on
PBR Materials Library
Eyecad VR offers a big PBR materials (Physically Based Rendering) library that includes a wide selection of samples frequently encountered in the context of architecture and design. Libraries are categorized into items that allow you to easily identify the type before making the choice in detail.
Why PBR materials?
Physically Based Shading (PBS) and Physically Based Rendering (PBR) refer respectively to a shading and rendering method designed to make the way light interacts with the surfaces of an object as accurate as possible.
Who uses a software in computer graphics, as in the case of eyecad VR transposes a series of objective advantages in the operational phase, including the fact of automating many procedures that affect the rendering of surface attributes, a factor that makes it much easier to define realistic assets with a relatively moderate effort, thanks to their high quality rendering with any light condition present in the scene.
Another of the aspects for which eyecad VR has chosen to make use of PBR materials is given by the fact that the PBR methodology defines work standards that allow more users to interact, even at different times. Automating procedures makes managing a project much simpler and more intuitive, and the parameters for defining a material are objectively reduced in number.